Step-by-Step Guide to Install Fedora 29 Server Edition
Step 1) Download Fedora Server 29 edition
First and foremost, you need to download the fedora 29 server edition iso file, to download click here
Step 2) Create a Bootable Disk
To install Fedora 29 server in your system, you need to create a bootable disk. Copy the downloaded ISO file into your USB/DVD/CD disk and burn the disk to create a bootable disk.
Step 3) Welcome Screen
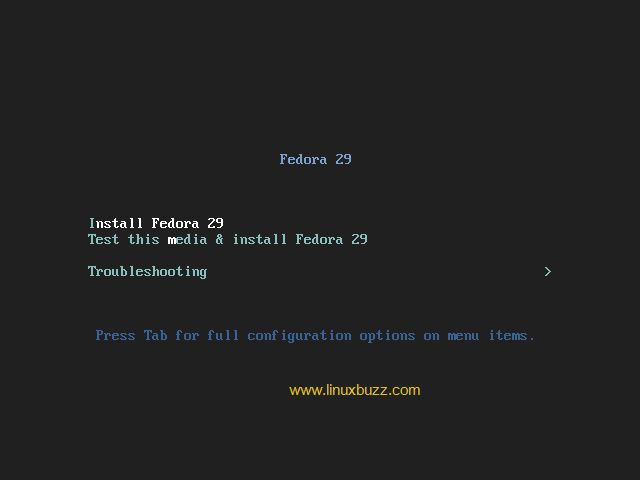
Once you boot using the bootable disk, you can see the fedora 29 server and choose “Install Fedora 29” to continue
Step 4) Choose your Language
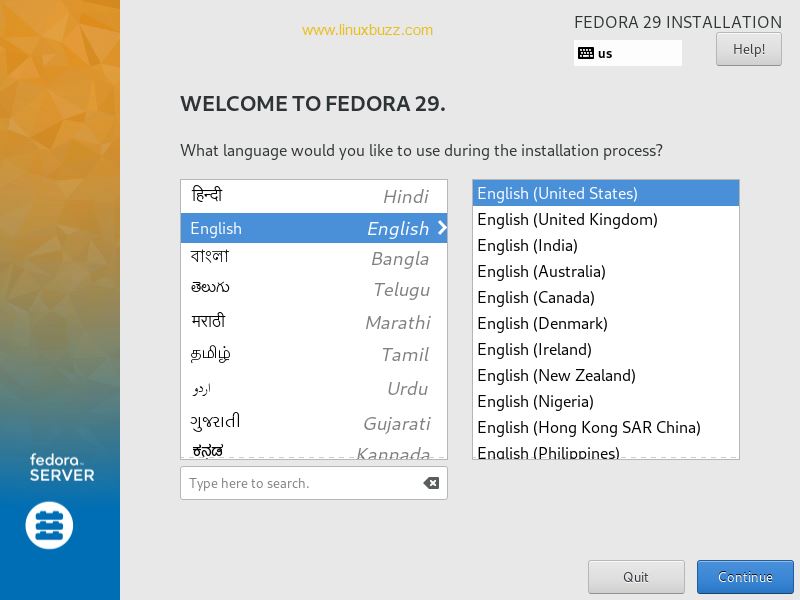
In the next screen, you’ll be asked to choose your language. Choose the language of your choice and click “Continue”
Step 5) Installation Summary
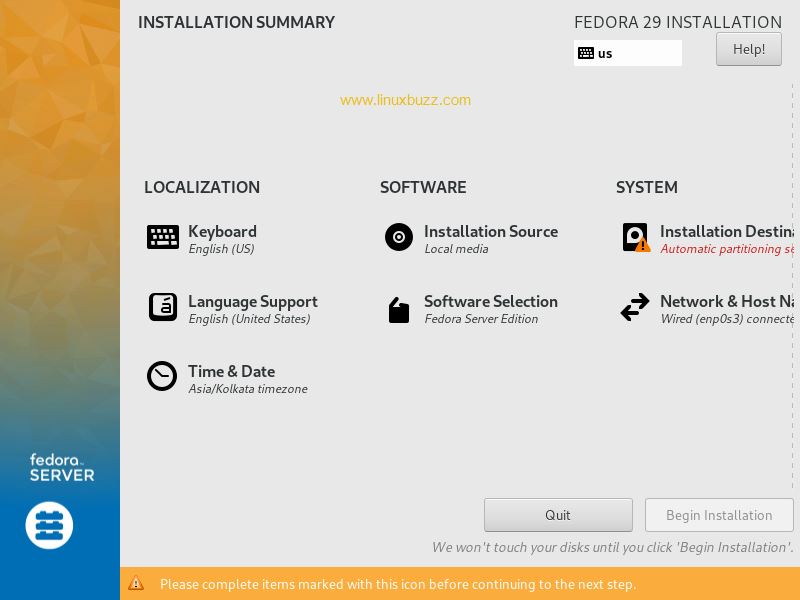
Installation summary is the section that allows you to configure various settings including your keyboard setting, installation destination, choose installation source, set date & time etc. Now choose Keyboard and you will be taken to the keyboard layout screen
Step 6) Keyboard Layout
Choose the keyboard layout you prefer and click “Done”. By default, English (US) is selected
Step 7) Choose Your Date & Time
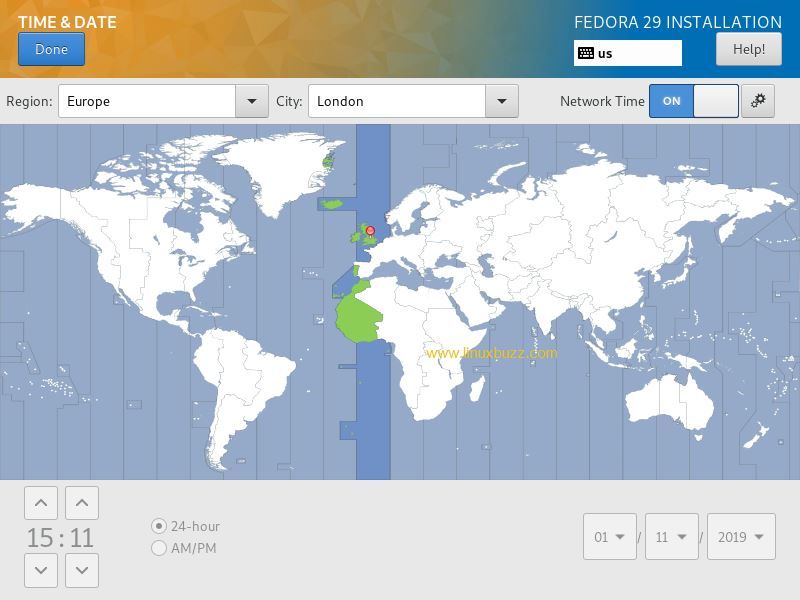
Now you will be taken to installation summary screen, click Date & Time and you’ll be taken to Date & time screen. Here choose your date and time settings.
Step 8) Choose Installation Destination
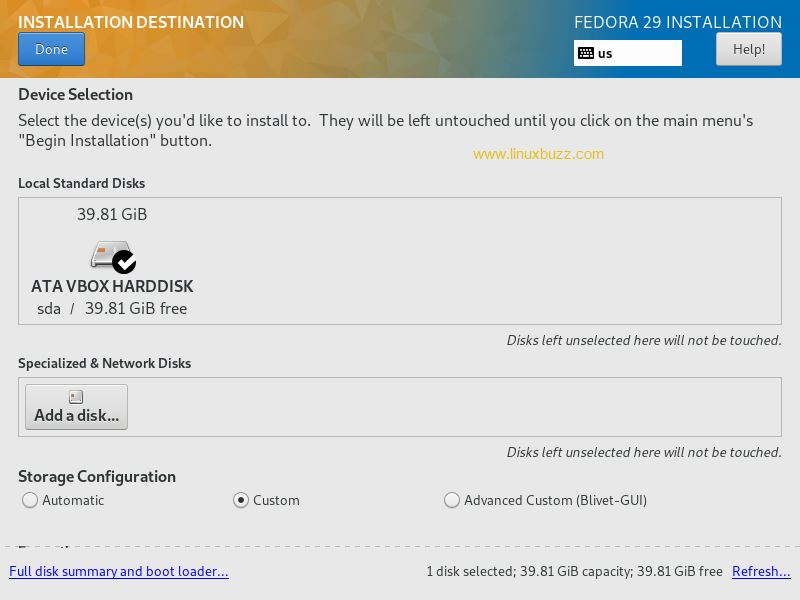
Here you’ll see the installed disks in your system. You can choose any of the listed disks or add a new disk by clicking the “Add disk” button or if you want manual configuration, click either on “Custom” or choose automatic to let the installer partition automatically.
In tutorial I will demonstrate how to create manual partition by selecting the custom option.
Click on Done, you will get below screen.
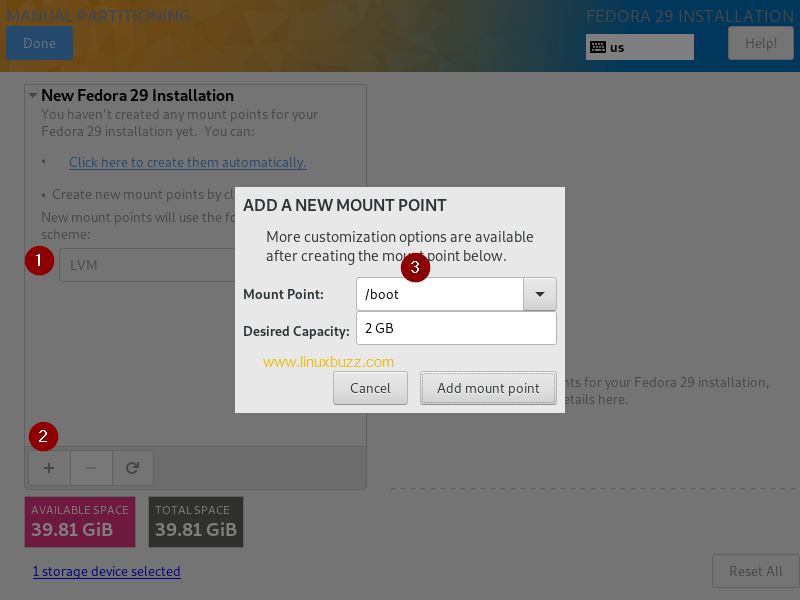
I will create LVM based partitions on 39 GB disk, to start creating partition click on + symbol. I am going to create following partitions
- /boot = 2 GB (ext4 File System)
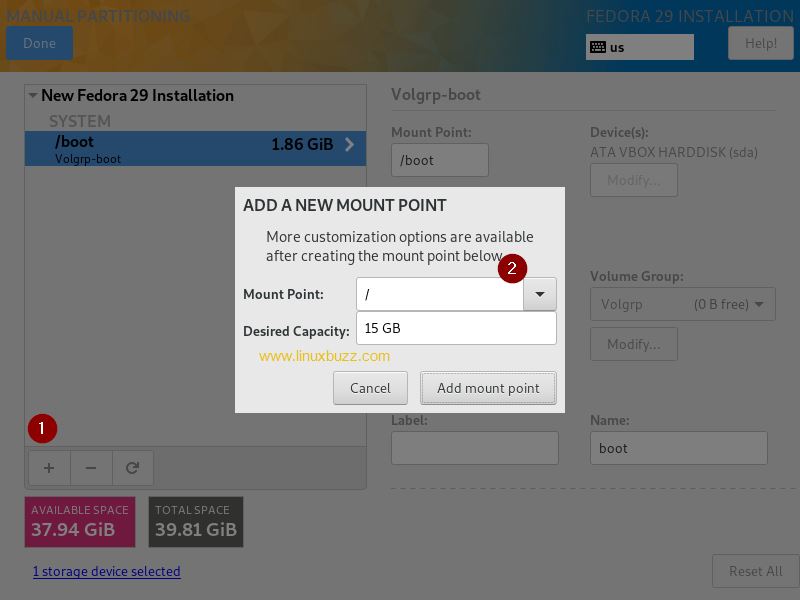
- / = 15 GB (ext4 File System)
- /var = 10 GB (ext4 File System)
- Swap = 2GB
Let’s create our first partition as /boot
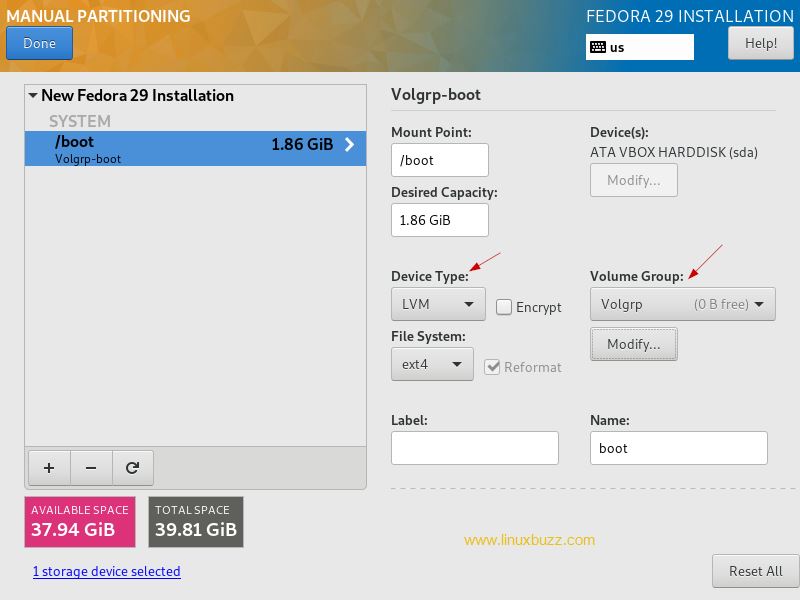
In the Next Window Select “Device Type” as LVM, File system Type as ext4 and it will also create Fedora as a Volume Group, though you can also change the Volume Group Name. In my case I am changing the Volume Group name as “Volgrp”
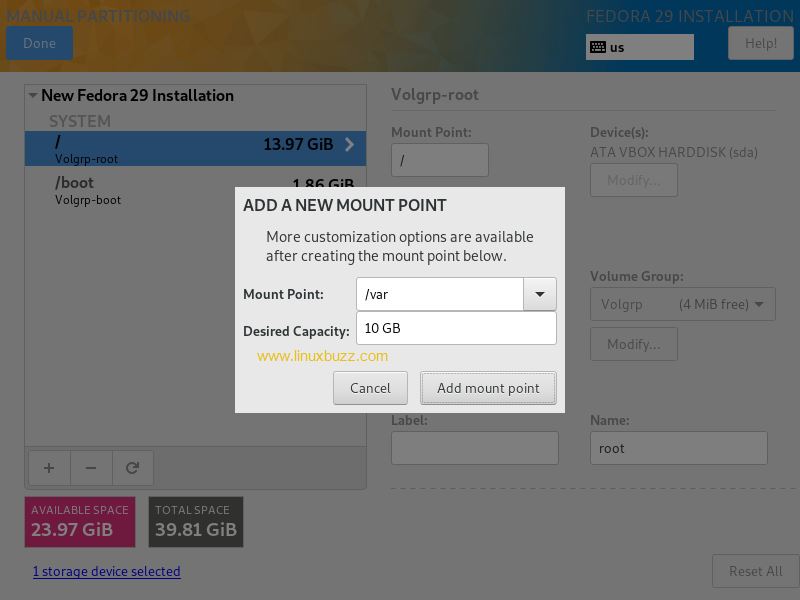
To create next partition click on + symbol specify the mount point and Size
Similarly create /var and Swap partition of Size 10 GB and 2 GB respectively.
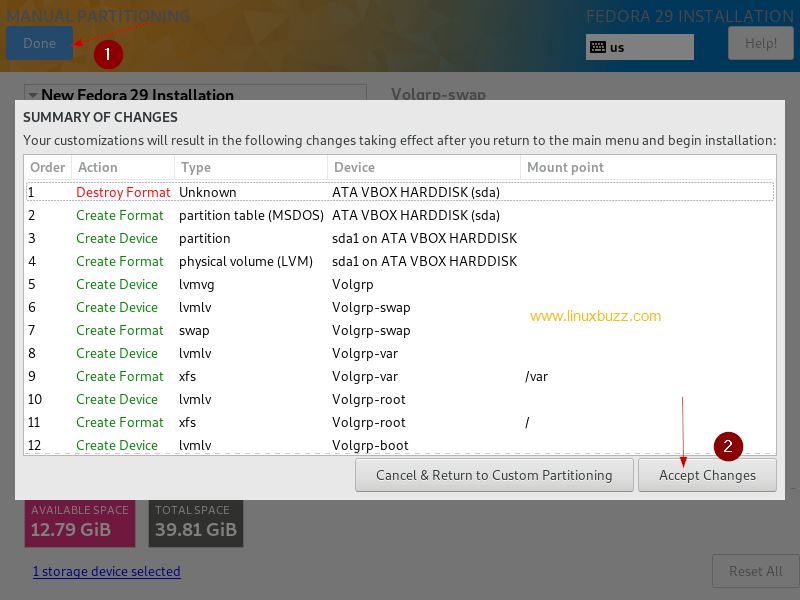
Once you are done with partition creations then click on “Done” option and then choose “Accept Changes”
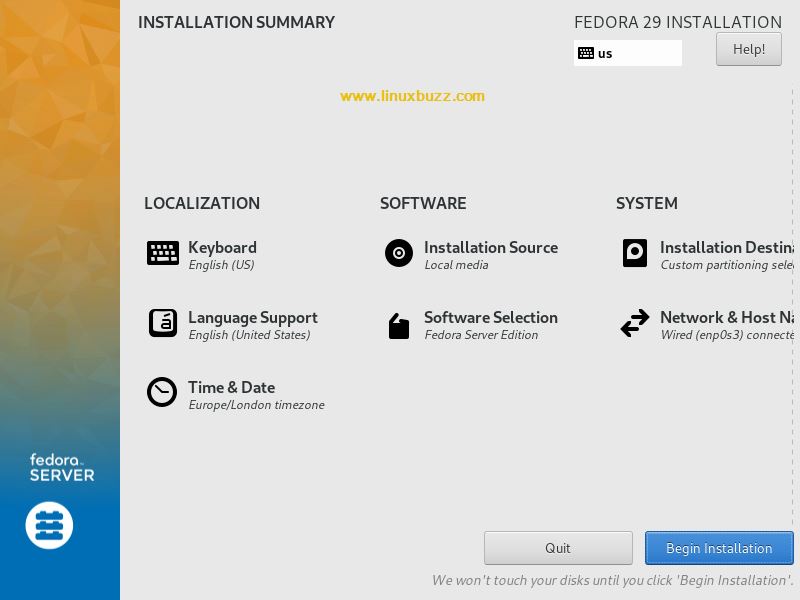
In the next window, click on “Begin installation” to start the installation, Here you can change Software Selection, by default “Fedora Server Edition” packages are selected, if want to change the software to be installed then click on “Software Selection” tab and select the appropriate software. In my case, I am taking it as default.
Step 9) Begin installation and set root password
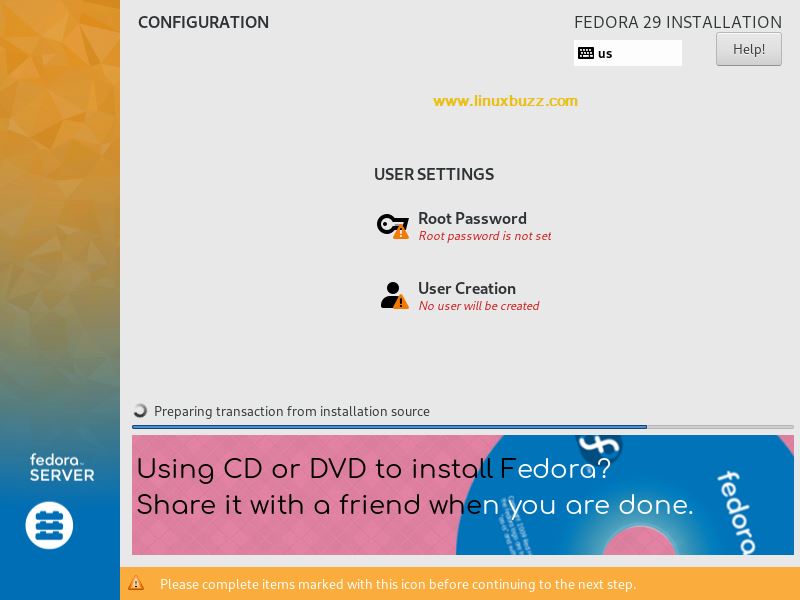
Once you are all set, click “Begin installation”. And you’ll be asked to set the password for root and create a new user for Fedora 29 Server.
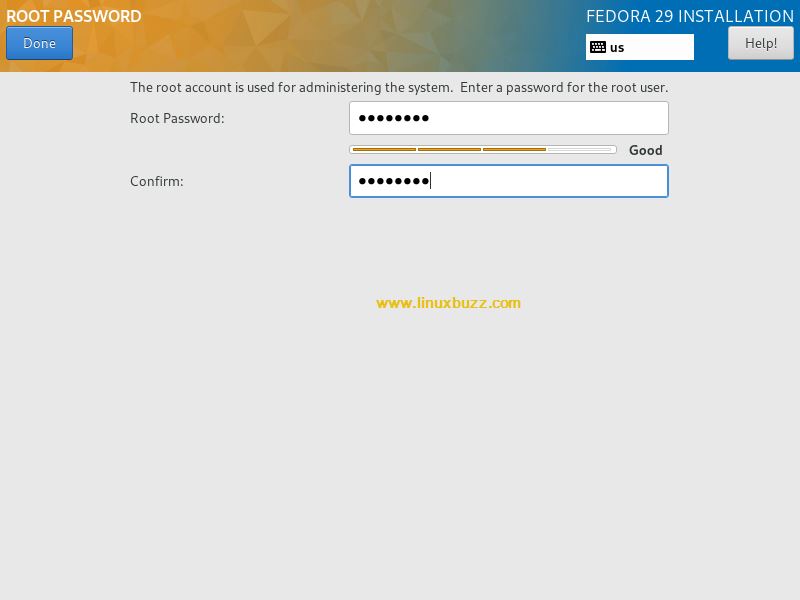
Click on “Root Password“, you can specify the root password to secure your Fedora 29 server. Provide a password of your choice and click “Done”
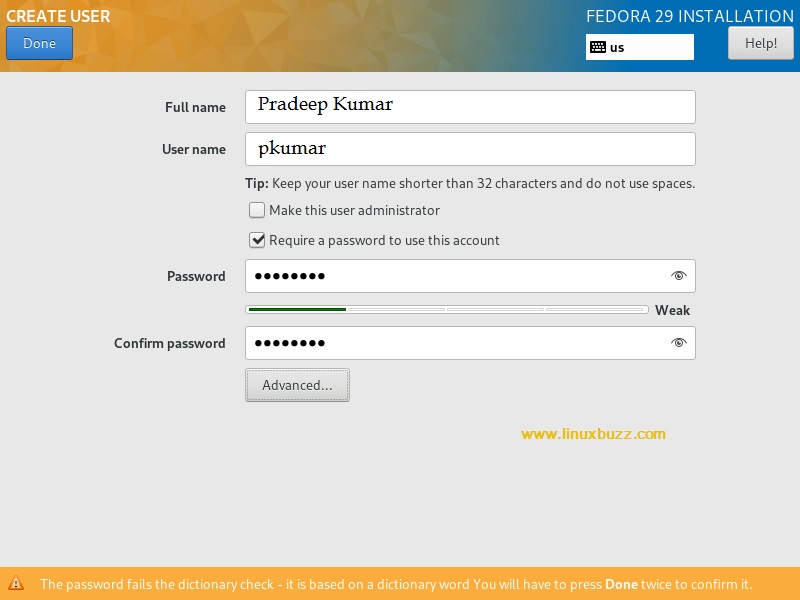
Click On “User Creation” and you’ll be taken to the user creation screen. Provide details like your full name, username, password and click “Done”
Step 10) Reboot system after successful installation
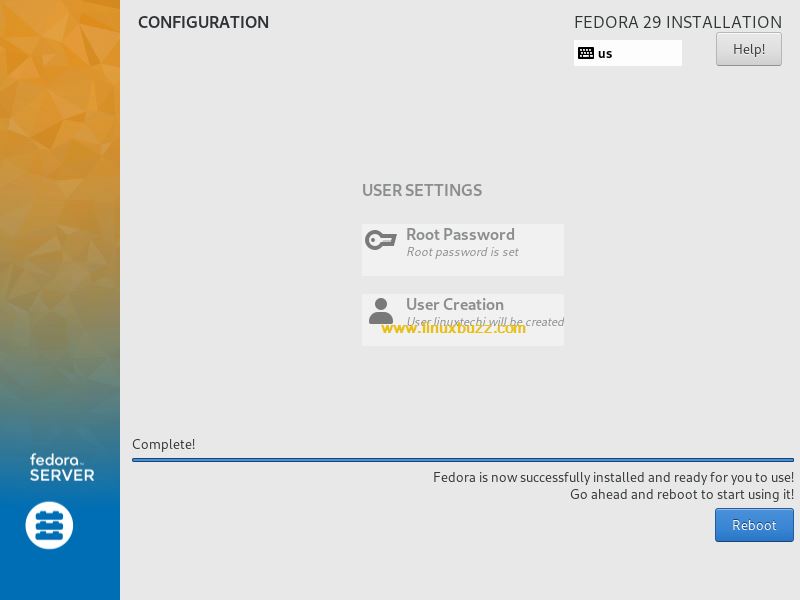
Once the installation is completed successfully, installer will prompt us to reboot the system,
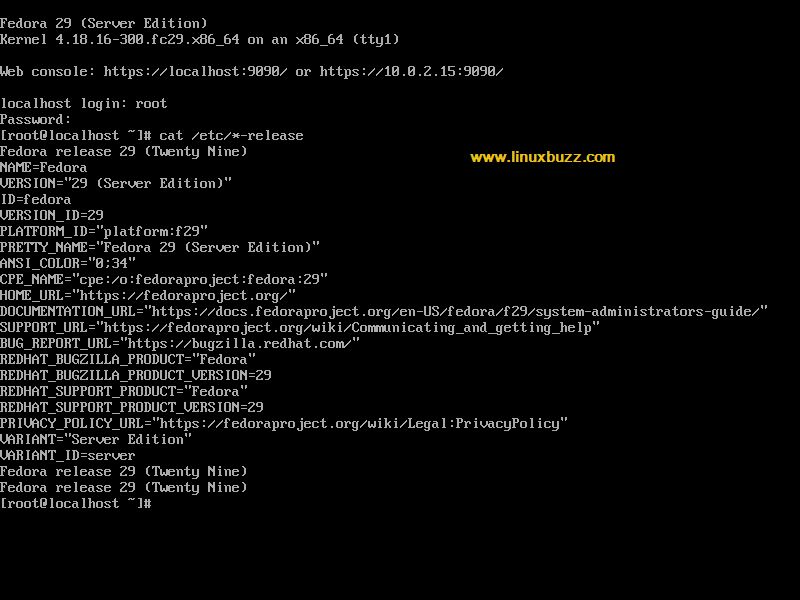
Click “Reboot” to restart your system. And once your system gets rebooted, it will ask for your username and password. Provide the username and password you just created and you’ll be logged into Fedora 29 Server edition and start enjoying the features of Fedora 29 server.
This confirms that Fedora 29 Server has been installed successfully, that’s all from this article, please do share your feedback and comments.





No comments:
Post a Comment